Literally, you can add texture to your 3D models by painting using programs such as Photoshop, Flash and CorelDraw. The principle behind this technique is fairly simple. When you have the image reference of your model, all you need to do is to paint it directly and export the file as JPEG or BMP.
The first thing I usually do is to render my 3D model on its left side. For example, I will use the turtle model I created in the previous chapter.
Figure 3-19. Rendered image of the turtle 3D model.
Using Macromedia Flash, I imported the image file and inserted a layer on top of it. Then, I just start to paint the model using the brush tool. If you’re an image editor, this step will be very easy for you.
Figure 3-20. 3D Paint Program – Macromedia Flash
Make sure to paint all the areas of the model including the areas which are not covered by the model. In that case, use the same color as those on the exterior of the model. Which in this case, it’s the color green. Export the image file and use it as a Diffuse Color in 3D Max.
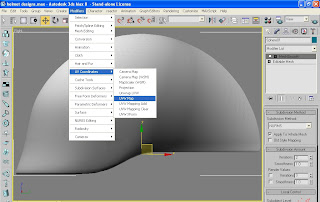
We need to add a UVW Map to the model so that we can adjust he texture and fit the image file to the model.
Figure 3-21. The UVW Map modifier.
Figure 3-22. The UVW Map Parameters.
When you finally done experimenting the parameters, try to render the model and see how the texture fits the model.
Figure 3-23. The rendered image file of the model.
Try This!
1. We’ll model a helmet and then we’re going to paint the object using a 3D paint program. Place a sphere on the Front viewport.
2. Convert the sphere to Editable Poly.
3. Select the Vertex and highlight the right side vertices. Use the Uniform Scale button to decrease the size of this side of the sphere.
4. Move these vertices inside the larger side of the sphere.
5. Select the second line of vertices and move them further inside the sphere.
6. Perform this step until all of the vertices are inside the sphere forming a concave object.
7. Now that we have the main shape of the helmet, let’s just adjust the lower portion so that it really looks like a helmet. I want you to select the lower-left half vertices and pull them downwards.
8. To smoothen up the helmet, scroll down the parameters and look for ‘Subdivision Surface’. Check on the ‘Use NURMS Subdivision’ and under the ‘Display’ group changes the value of ‘Iterations’ to 2.
9. Our helmet is ready to be painted. Activate the left side of the helmet and switch the viewport to Smooth + Highlights. Then, press the ‘Print Screen’ button on your keyboard.
10. You can use any paint tool or image editing tool such as Adobe Photoshop, CorelDraw, and Macromedia Flash. In this case, I used Flash to paint the helmet.
11. Start with the inner design of the helmet and work out your way to the main color of the helmet.
12. Make sure to cover all the areas and don’t leave any portion without getting it painted.
13. Export the paint job as JPEG or any image file. Open the helmet object in Max and apply the texture as Diffuse Color.
14. Don’t just drag the texture to the helmet. First, we have to apply ‘UVW Map’ modifier so that we can easily adjust the texture to the helmet.
15. Now, drag the texture to the helmet. Notice how disoriented the helmet map. We can fix this using the ‘Parameters’ of the UVW Map modifier.
16. Configure the values of ‘Length’ and ‘Width’ until the map is fitted to the helmet. Or you can use the ‘Gizmo’ to manually move the texture around the helmet.
17. If you’re done, try rendering and see how your helmet design looks like.


No comments:
Post a Comment