
Texturing takes many forms such as planar projection mapping, spherical projection mapping, transparency mapping, bump mapping, and a help from a 3D paint program. I’ll discuss them one by one starting with the easiest which is the planar projection mapping.
A. PLANAR PROJECTION MAPPING
This mapping technique is usually seen in plane or smooth objects such as wall, floor, paper, book, or any object that’s plane. Let’s see how the table will look like if we are going to apply a wood texture on it.

Figure 3-1. A table model without wooden texture.
You can find all texturing commands on the ‘Material Editor’ button on the Main Toolbar. Or you can press ‘M’ on the keyboard.

Figure 3-2. Material Editor on the Main Toolbar.

Figure 3-3. The Material Editor dialog box.
We’ll use the first slot and place the wood texture here. 3D Max has already some pre-set textures such as wood. You can get the wood texture on the ‘Maps’ roll-out just located at the lower portion of the dialog box.

Figure 3-4. Map roll-out.
Usually, you can just use the ‘Diffuse Color’ to add texture to any plane object. To get the wood texture, click on the ‘None’ button beside the Diffuse Color. The ‘Material/Map Browser’ will appear and on the left side there’s a list of materials you can choose from. Scroll down and look for the ‘Wood’ material and double click on it.

Figure 3-5. Material/Map Browser.

Figure 3-6. The Wood material appears on the first slot.
Notice that the sphere in the first slot has the wooden material applied on it. Now, you can apply this material to the table by simply dragging the first slot to the top of the table and its four legs.
If no wood material appeared once you dragged the slot from the Material Editor, then you have to click the ‘Show Map in Viewport” button indicated by the red circle below.

Figure 3-7. The Show Map in Viewport button.
This is how the table will look like when you’re done.
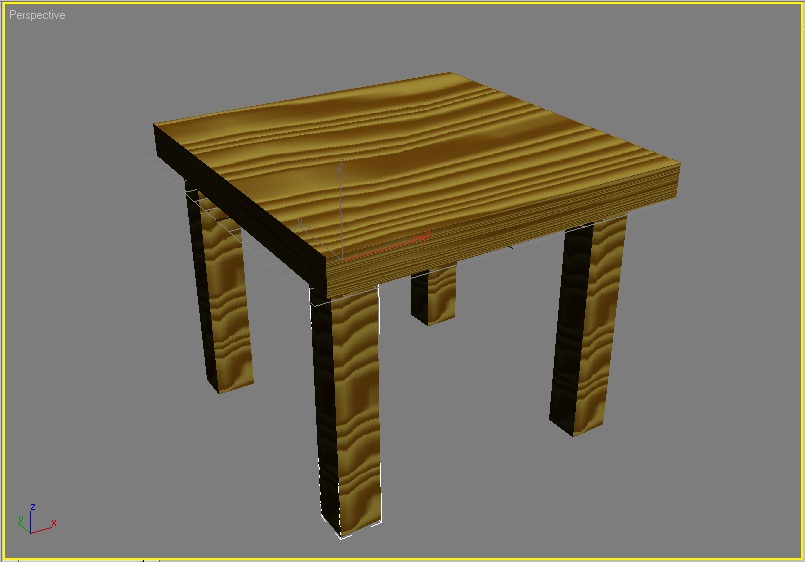
Figure 3-8. The table model with wood texture applied.
Try This!
1. In this exercise, we’ll model a picture frame and add texture on it. At the end you should be able to come up with a similar model like the one below.

2. First, we’ll model the picture frame using lines then Loft them. Create a rectangular shape in the front viewport using the ‘Rectangle’ under the ‘Shapes’ button.]

3. Add another rectangle, this time make it smaller. It will be the shape of the picture frame.

4. Now, select the larger rectangle and loft it with the smaller rectangle. Your model should look like the image below.

5. Highlight the 2 rectangles and delete them. We don’t need them anymore.
6. On the Material Editor, apply a specular level of 90.

7. Change the diffuse color by clicking on the color gray box beside ‘Diffuse:’

8. You may use any color you want. Just move the mouse pointer inside the color spectrum and click on the ‘Close’ button when you’re done.

9. Drag the active slot from the Material Editor to the picture frame.

10. Place a plane in the picture frame.

11. Open the Material Editor and select the second empty slot.

12. Click on the ‘Maps’ roll-out.

13. Then, click on the ‘None’ button beside the ‘Diffuse Color’.

14. Double click on the ‘Bitmap’.

15. In the ‘Select Bitmap Image File’ open the ‘Sunset.jpg’ which is found in My Documents. Or you can use any picture you have on your computer right now.

16. Click on the ‘Go to Parent’ button.

17. Apply a specular level of 90 so that the picture will be shinny when you change the view angle.
18. This time drag the second slot to the plane.

That’s it! Click on the Quick Render button and see how our picture looks like.

No comments:
Post a Comment