
Figure 1-2 The Main Toolbar
The Main Toolbar is located just below the Main Menu. It has several buttons which I will introduce to you in this section.
UNDO AND REDO BUTTONS

Figure 1-3. The Undo and Redo buttons (encircled).
These buttons are used every time you want to make changes to your work. But there’s a catch! You can only make until 20 undos. I have checked it out and it really does count only up to 20. Unlike MS Word, which you can list down all the changes you made to your document, you have to be sure of the changes you make to your MAX files.
SELECT AND LINK AND BIND TO SPACE WARP

Figure 1-4. The Select and Link and Bind To Space Warp buttons.
If you want to link two or more objects, then you can use the SELECT AND LINK button. It works pretty much like on how you group objects in a document file. You can also link a 3D object to a space warp such as Bones. I’ll teach you how to use these buttons when we reach Part V which is Rigging and Animation.
By the way, you can place the mouse pointer on top of every button to see the label of the button you’re trying to use.
SELECT AND MOVE, ROTATE AND UNIFORM SCALE
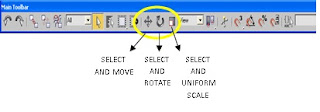
Figure 1-5. Select and Move, Rotate and Uniform Scale buttons.
We’ll be using these buttons more often than the other buttons found on the Main toolbar. Let me just go over and discuss briefly what these buttons do.
SELECT AND MOVE – When you want to select or move your objects in the space, you use the Select and Move button. Just a note, use this button if you want to change the position of the object/s you are working with in the virtual space. You will encounter another button which functions similarly with Select and Move but does not affect the position of the object you’re working.
SELECT AND ROTATE – Use this button when you want to rotate the object relatively in its position. Again, there’s another that works just the same as Select and Rotate. I’ll introduce these buttons later.
SELECT AND UNIFORM SCALE – Curiously, you can also change the length, width or both at the same time using the Select and Uniform Scale button. Don’t worry, you’ll be working with these three buttons shortly.
MIRROR AND ALIGN

Figure 1-6. The Mirror and Align buttons.
Copying 3D objects in Max is also possible. There are two ways. One is to use the Mirror button and the other one is by pressing the SHIFT key and simply move the object. You can also align objects with the Align button.
MATERIAL EDITOR

Figure 1-7. Material Editor button.
Placing colors or textures to your 3D objects will be done using the Material Editor. At first, your 3D objects will look barely in one color, just like the famous ghost cartoon Slimer. But when you start working with the Material Editor things can be really fun!
QUICK RENDER

Figure 1-8. The Quick Render button.
I guess you have heard the term render before. As what the word says, the Quick Render button allows you to render your work without having to configure anything. You will learn more about rendering at the last part of this book. For now, why don’t you try out the activity I prepared for you?
Try This!
In this activity, I will orient you with the common buttons that you will be using more frequently than the other buttons found in Max.
1. You may save your work as ‘Teapot-test.max’.
2. Locate the button ‘Teapot’ at the right side of Max. Then click on it.
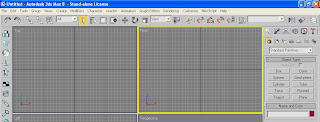
3. Place the Teapot on the ‘Front’ viewport. Just drag the object at the center of the viewport.
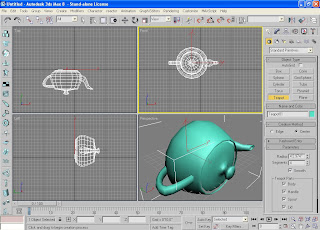
4. This time click on the Select and Move button on the Main toolbar. Notice that you will see two arrows in the Front viewport. The green arrow represents the Y axis while the red arrow represents the X axis. These arrows are called gizmos.
Now, I want you to move the teapot to the center of the Front viewport by placing your mouse pointer on the head of the green arrow. Just drag it upwards and downwards. Do the same for the red arrow, but this time drag it sideways.
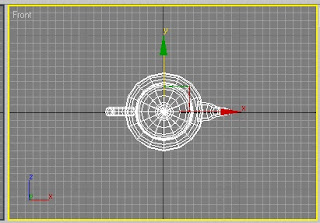
5. There’s another way of doing that. Notice the two lines forming at the corner of the two arrows? Yes, place the mouse pointer on either of the lines, the green, the red, you choose. When the corner is highlighted, you can drag it anytime.
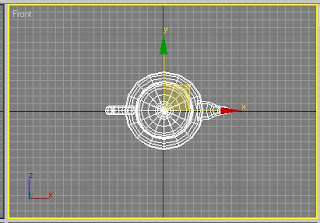
6. That’s about moving the object. Let’s turn the Teapot upwards so that it does not look like someone has just spilled tea on the floor. Click on the Select and Rotate on the Main toolbar this time.
7. Place the mouse pointer on the red line. Then, slowly drag it upwards.
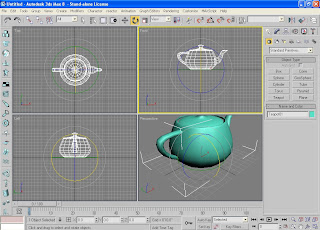
8. Adjust its position move the Teapot exactly at the center of the Front viewport.
9. We’ll stretch our Teapot to make it look cartoony. Click on the Select and Uniform Scale button on the Main toolbar.
10. Place the mouse pointer on the green line (vertical). Then, drag it upwards. Stretch it!
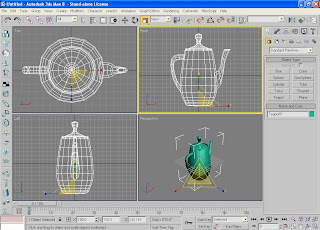
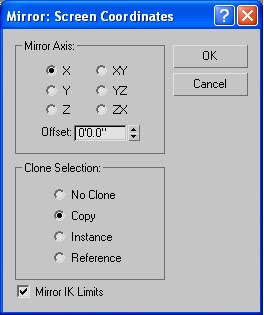
11. Let’s make a copy of our tall Teapot. Make sure the Teapot is still activated. You can say this if the object is highlighted in the viewports (line color is white). Click on the Mirror button on the Main Toolbar.
12. The ‘Mirror: Screen Coordinates’ dialog box will appear. Under the ‘Clone Section’, tick on copy. You may now click on the ‘OK’ button.
13. Using the Select and Move button, place the new Teapot beside the first one. Just like the figure below.
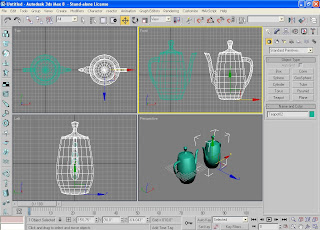
14. After this, you can take a quick look of your work by clicking on the ‘Quick Render’ button found still on the Main toolbar. Max will render the viewport that is active (highlighted in yellow line).
Well, I hope you liked what you’ve learned so far. I’ll continue introducing you to the other parts of Max interface.

No comments:
Post a Comment